Back to Blog
Guides
Robert SfichiLast updated on Apr 29, 202627 min read

Web Scraping with Selenium: Python Step-by-Step Tutorial

Web Scraping with Selenium: Python Step-by-Step Tutorial
TL;DR: Selenium lets you scrape JavaScript-heavy websites by driving a real browser from Python code. This tutorial walks you through every phase: installing Selenium, configuring Chrome, locating and interacting with elements, handling waits and pagination, exporting clean data, and scaling your scraper with proxies, Selenium Grid, and API-based alternatives.

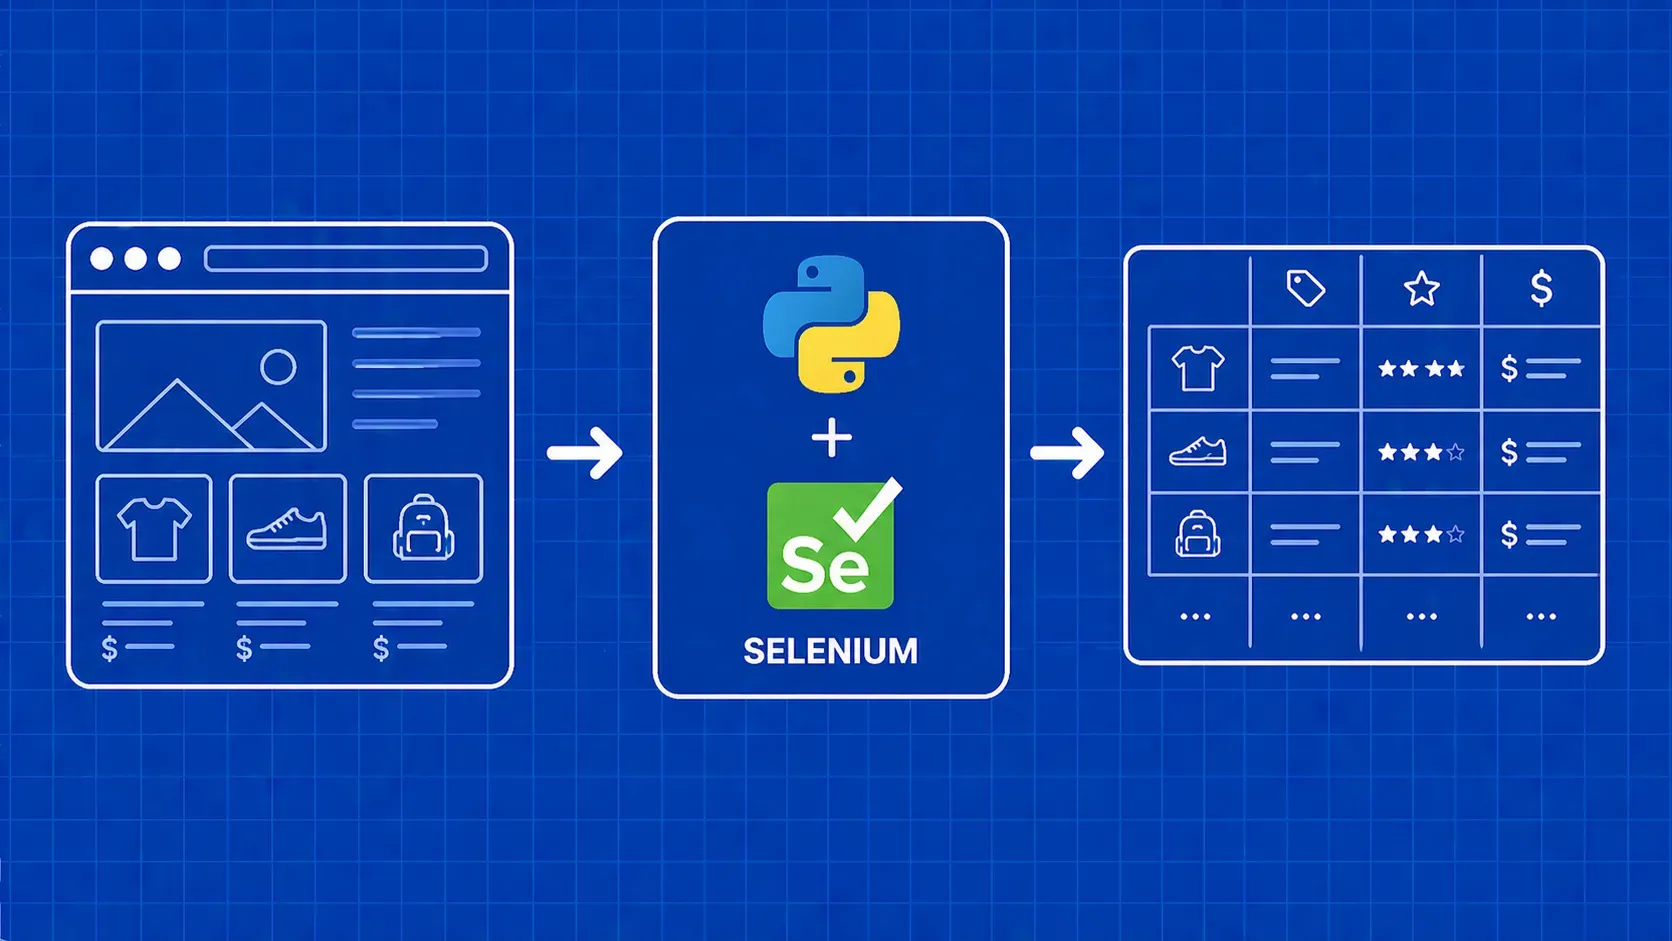
Selenium is a browser automation framework that controls a real browser instance (Chrome, Firefox, Edge, and others) through code. While it was originally built for testing web applications, it has become one of the most widely used tools for web scraping with Selenium, especially on sites where JavaScript renders the content you need.

If you have tried scraping a single-page application or an infinite-scroll feed with requests and BeautifulSoup, you already know the problem: the HTML you download is an empty shell. The actual data loads after JavaScript runs, and a plain HTTP client never executes that JavaScript. Selenium solves this by launching a full browser, loading the page exactly the way a human visitor would, and then giving you programmatic access to the resulting DOM.

This tutorial covers every practical step of selenium web scraping in Python: environment setup, element location strategies, waiting for dynamic content, scrolling, pagination, data export, proxy integration, and performance tuning. By the end, you will have a working end-to-end scraper and a clear picture of when Selenium is the right choice versus lighter alternatives.

What Is Selenium and Why Use It for Web Scraping?

Selenium started life as a testing framework in 2004 and has evolved through several major versions since then. Today, Selenium WebDriver communicates with browsers through the W3C WebDriver protocol, a standardized API that all major browser vendors implement natively. You write instructions in Python (or Java, JavaScript, Ruby, C#, and several other languages), and the WebDriver translates those instructions into actions inside a real browser session. The browser renders HTML, executes JavaScript, applies CSS, and fires network requests, just like it would for a human sitting at a keyboard.

That full rendering pipeline is exactly what makes Selenium valuable for scraping. Traditional HTTP libraries such as requests fetch the raw HTML document the server sends back. If the page relies on client-side JavaScript to populate a product grid, load reviews, or assemble a dashboard, you get none of that data. Selenium, on the other hand, waits for the JavaScript to run and gives you the fully rendered DOM.

Selenium also supports every major browser (Chrome, Firefox, Edge, Opera, Safari) and works across operating systems. This cross-browser support matters when a target site behaves differently depending on the browser engine. And because Selenium mimics genuine user behavior (clicking, typing, scrolling), it can navigate interactive workflows that static scrapers simply cannot reach.

The tradeoff is resource cost. Running a full browser takes real CPU and RAM, and it is noticeably slower than firing off a lightweight HTTP request. Selenium was designed as a testing tool, so some of its abstractions (the WebDriver protocol overhead, the lack of built-in auto-wait) add friction for pure scraping use cases. That said, its massive community, extensive documentation, and broad language support make it one of the safest starting points for anyone getting into browser-based data extraction. We will address performance considerations and alternatives later in the tutorial.

When Selenium Is (and Isn't) the Right Scraping Tool

Selenium is the right pick when the page you need to scrape requires JavaScript execution to render its content. Think single-page applications built with React, Angular, or Vue; sites behind login forms; pages with infinite scroll; and dashboards where data loads via AJAX calls after the initial page load.

It is not the best choice for large-scale crawling of static HTML pages. For those jobs, requests paired with BeautifulSoup or a framework like Scrapy will be faster, lighter on memory, and easier to scale. The comparison between Scrapy and Selenium comes down to whether you need a browser at all. Newer browser automation libraries such as Playwright and Puppeteer also deserve consideration when you want modern async APIs with built-in auto-wait features.

Here is a quick decision checklist:

  • Static HTML, no JS needed: Use requests + BeautifulSoup.
  • Large crawl, static pages: Use Scrapy.
  • JS-rendered pages, multi-language team: Use Selenium.
  • JS-rendered pages, Python/JS only, want modern API: Consider Playwright.

A practical rule of thumb: start with the lightest tool that works. If requests fetches the data you need, stop there. If the content is JavaScript-rendered and you want broad language support plus a mature ecosystem, web scraping with Selenium is a solid middle ground.

Prerequisites and Environment Setup

Before you write a single line of scraping code, you need three things installed: Python 3.8 or later, the Selenium package, and a browser driver that matches your browser version.

Install Python and Selenium

Open a terminal and confirm your Python version:

python --version

Then install Selenium via pip:

pip install selenium

As of version 4.6, Selenium ships with a built-in tool called selenium-manager that can automatically download and configure the correct browser driver for you. In earlier versions, you had to manually download ChromeDriver (or GeckoDriver for Firefox) and add it to your system PATH. If you are running Selenium 4.6 or later, you can skip manual driver management in most cases, though it is worth verifying that your Chrome and ChromeDriver versions align if you run into launch errors.

Verify the Installation

Create a quick test script to confirm everything works:

from selenium import webdriver

driver = webdriver.Chrome()
driver.get("https://example.com")
print(driver.title)  # Should print "Example Domain"
driver.quit()

If a Chrome window opens, loads the page, and prints the title to your console, your environment is ready. If not, check that Chrome is installed and that your Selenium version matches the major Chrome version on your machine.

Virtual Environments

It is good practice to work inside a virtual environment so Selenium and its dependencies do not conflict with other projects:

python -m venv scraper-env
source scraper-env/bin/activate   # On Windows: scraper-env\Scripts\activate
pip install selenium beautifulsoup4 pandas

BeautifulSoup handles fast HTML parsing once Selenium fetches the rendered page source, and pandas makes data cleaning and CSV export straightforward. Both are optional but show up frequently in real-world web scraping with Selenium Python workflows, so having them installed from the start saves time.

At this point your environment is ready. The next step is to configure Chrome so it behaves the way you want during a scraping session.

Configuring Chrome Options for Scraping

Selenium launches Chrome with its default settings, but those defaults are not ideal for scraping. The ChromeOptions class lets you customize the browser session before it starts.

from selenium import webdriver

options = webdriver.ChromeOptions()
options.add_argument("--headless=new")          # Run without a visible window
options.add_argument("--disable-gpu")           # Prevents GPU-related issues in headless
options.add_argument("--window-size=1920,1080") # Consistent viewport for element visibility
options.add_argument("--no-sandbox")            # Required in some CI/Docker environments
options.add_argument("--disable-dev-shm-usage") # Avoids shared memory issues in containers
options.add_argument("user-agent=Mozilla/5.0 (Windows NT 10.0; Win64; x64) "
                     "AppleWebKit/537.36 (KHTML, like Gecko) "
                     "Chrome/125.0.0.0 Safari/537.36")

driver = webdriver.Chrome(options=options)

Headless mode runs Chrome without rendering a graphical window. This cuts resource usage and speeds up execution, which matters when you are running scrapers on a server or in a CI pipeline. The --headless=new flag replaced the older --headless flag in Chrome 109 and provides better feature parity with headed mode. For more background on headless browsers and when to use them, a dedicated primer on headless browser architecture is a helpful reference.

Setting a custom user-agent string helps your requests blend in with regular browser traffic instead of advertising that they come from an automated tool. Combine this with a realistic window size so that responsive layouts serve the desktop version of the page you expect to parse.

Other useful flags include --disable-extensions (skips loading extensions that add startup time), --disable-infobars (hides the "Chrome is being controlled" banner), and --disable-notifications (blocks pop-ups that can obscure elements). Together, these flags create a lean browser profile optimized for data extraction rather than interactive browsing.

Launching a Browser and Navigating to a URL

With your options configured, spinning up a browser and visiting a page takes two lines:

driver = webdriver.Chrome(options=options)
driver.get("https://books.toscrape.com/")

driver.get() blocks until the browser fires its load event, meaning the initial HTML, CSS, and synchronous JavaScript have finished. It does not wait for AJAX calls that fire after the load event, so you may still need explicit waits for dynamically injected content (covered in the waits section below).

A few useful properties right after navigation:

print(driver.title)        # Page <title> text
print(driver.current_url)  # Final URL after any redirects

Always call driver.quit() when you are done, either in a finally block or by using Selenium as a context manager. Leaving browser processes running will leak memory fast, especially in loops. A simple pattern looks like this:

try:
    driver = webdriver.Chrome(options=options)
    driver.get("https://example.com")
    # ... scraping logic ...
finally:
    driver.quit()

This ensures the browser shuts down even if your code throws an exception partway through. Getting comfortable with this kind of resource management early will save you from orphaned Chrome processes eating up your server's memory in production. On a development machine, check your task manager periodically to confirm no stale chrome or chromedriver processes are lingering from crashed scripts.

Locating Elements on the Page

Finding elements is the core of any selenium scraping tutorial. Selenium provides two primary methods, find_element() (returns the first match) and find_elements() (returns a list of all matches), each of which accepts a By locator strategy.

Common Locator Strategies

from selenium.webdriver.common.by import By

# By ID (fastest, most reliable when available)
driver.find_element(By.ID, "search-input")

# By class name
driver.find_elements(By.CLASS_NAME, "product-card")

# By CSS selector
driver.find_element(By.CSS_SELECTOR, "div.results > a.item-link")

# By XPath
driver.find_element(By.XPATH, "//table[@id='data']//tr")

# By tag name
driver.find_elements(By.TAG_NAME, "tr")

# By name attribute
driver.find_element(By.NAME, "email")

ID-based locators are typically the fastest because the browser can jump straight to the element without traversing the DOM tree. If the target element does not have an ID, CSS selectors are the next best option for most use cases: they are compact, readable, and well-supported.

XPath vs. CSS Selectors

XPath excels when you need to navigate up the DOM (parent axis), match by text content, or use complex predicates. For instance, //div[contains(text(), 'Price')] is easy in XPath but has no direct CSS equivalent. CSS selectors are generally faster to evaluate and easier to read for simple patterns like div.card > h3.title. Use XPath when CSS cannot express the relationship you need; stick with CSS for everything else. Understanding the tradeoffs between XPath and CSS selectors is worth a deeper look if you are building selectors for complex page structures.

find_element vs. find_elements

find_element() throws a NoSuchElementException if nothing matches, while find_elements() returns an empty list. When scraping, find_elements() is usually safer because you can check the list length before processing, avoiding try/except blocks for missing elements.

cards = driver.find_elements(By.CSS_SELECTOR, ".product-card")
if cards:
    for card in cards:
        title = card.find_element(By.CSS_SELECTOR, "h3").text
        price = card.find_element(By.CSS_SELECTOR, ".price").text
        print(title, price)

Notice that you can chain find_element calls on a WebElement (not just the driver). This scopes the search to that element's subtree, which is both faster and more precise when you are iterating over repeated structures like cards or table rows.

The selenium find element web scraping workflow is essentially: identify the locator strategy, test it in the browser's DevTools console, then encode it in your Python script. Chrome DevTools lets you test CSS selectors with $$() and XPath with $x() right in the console, which speeds up selector development considerably.

Interacting with Page Elements

Once you have located an element, Selenium gives you methods to act on it just like a human user would. The WebElement object exposes actions such as clicking, typing, reading text, and retrieving attribute values.

Click, Type, and Read

from selenium.webdriver.common.keys import Keys

# Click a button
driver.find_element(By.ID, "load-more").click()

# Type into an input field
search_box = driver.find_element(By.NAME, "q")
search_box.clear()
search_box.send_keys("web scraping with selenium")
search_box.send_keys(Keys.RETURN)

# Read text content
heading = driver.find_element(By.TAG_NAME, "h1").text

# Read an attribute value
link = driver.find_element(By.CSS_SELECTOR, "a.detail-link")
href = link.get_attribute("href")

The .text property returns the visible text of an element, while .get_attribute() reads any HTML attribute (href, src, data-*, etc.). These two methods are your primary data extraction tools at the element level.

Working with Dropdowns

For <select> elements, Selenium provides a convenience class:

from selenium.webdriver.support.ui import Select

dropdown = Select(driver.find_element(By.ID, "sort-by"))
dropdown.select_by_visible_text("Price: Low to High")

You can also select by value (select_by_value("price_asc")) or by zero-based index (select_by_index(2)). Modern web applications increasingly use custom dropdown components instead of native <select> elements, in which case you will need to click the dropdown trigger and then click the desired option as separate find_element and click calls.

Chaining Actions

The ActionChains API lets you compose complex interactions such as hover, drag-and-drop, and right-click:

from selenium.webdriver.common.action_chains import ActionChains

menu = driver.find_element(By.ID, "mega-menu")
ActionChains(driver).move_to_element(menu).perform()

This is useful for scraping mega-menus, tooltips, and other elements that only appear on hover. You can chain multiple actions before calling .perform() to execute them in sequence.

Each of these interaction methods waits for the element to be present in the DOM, but not necessarily visible or clickable. Combine them with explicit waits (covered next) to avoid race conditions on pages that load content asynchronously.

Waiting Strategies: Implicit, Explicit, and Fluent Waits

Dynamic pages load content asynchronously, and one of the most common selenium web scraping mistakes is trying to locate an element before it exists in the DOM. Hardcoding time.sleep(5) technically works, but it wastes time on fast pages and fails on slow ones. Selenium offers three smarter alternatives.

Implicit Waits

An implicit wait tells the driver to poll the DOM for a specified number of seconds before throwing a NoSuchElementException:

driver.implicitly_wait(10)  # Applies globally to all find_element calls

This is simple to set up, but it applies to every lookup, which can mask performance problems and slow down your scraper when elements genuinely do not exist. You also cannot customize the condition: it only checks presence, not visibility or clickability.

Explicit Waits

Explicit waits are the recommended approach for selenium scraping tutorial best practices. You specify a condition and a timeout, and the driver polls until the condition is met:

from selenium.webdriver.support.ui import WebDriverWait
from selenium.webdriver.support import expected_conditions as EC

element = WebDriverWait(driver, 15).until(
    EC.visibility_of_element_located((By.CSS_SELECTOR, ".results-container"))
)

Common conditions include:

  • presence_of_element_located: element exists in the DOM (may be hidden)
  • visibility_of_element_located: element is both present and visible
  • element_to_be_clickable: element is visible and enabled
  • text_to_be_present_in_element: element contains specific text
  • staleness_of: element is no longer attached to the DOM (useful after navigation)

These let you wait for exactly what you need and nothing more, which keeps your scraper fast without sacrificing reliability.

Fluent Waits

A fluent wait is an explicit wait with extra tuning: you set the polling interval and which exceptions to ignore during polling.

from selenium.webdriver.support.ui import WebDriverWait
from selenium.common.exceptions import NoSuchElementException

wait = WebDriverWait(
    driver, timeout=20, poll_frequency=0.5,
    ignored_exceptions=[NoSuchElementException]
)
element = wait.until(
    EC.presence_of_element_located((By.ID, "dynamic-table"))
)

Use fluent waits when the default 500ms polling interval is too aggressive for a rate-limited or slow-loading target. In most web scraping with Selenium scenarios, a standard explicit wait with WebDriverWait covers your needs. The key takeaway is this: always prefer WebDriverWait over time.sleep(). It is both faster and more reliable.

Executing JavaScript and Scrolling Techniques

Some interactions are easier (or only possible) through raw JavaScript execution. Selenium's execute_script() method runs any JavaScript snippet inside the browser context and returns the result to your Python code.

Basic Script Execution

page_height = driver.execute_script("return document.body.scrollHeight;")
print(f"Total page height: {page_height}px")

You can pass Python objects as arguments to the script and reference them via arguments[0], arguments[1], etc. inside the JavaScript string. Return values are automatically converted to their Python equivalents (dicts, lists, strings, numbers).

Scroll to the Bottom of the Page

The most common use case in scraping is infinite scroll. Here is a reliable loop pattern for selenium scrape dynamic website scenarios:

import time

last_height = driver.execute_script("return document.body.scrollHeight")

while True:
    driver.execute_script("window.scrollTo(0, document.body.scrollHeight);")
    time.sleep(2)  # Allow content to load
    new_height = driver.execute_script("return document.body.scrollHeight")
    if new_height == last_height:
        break
    last_height = new_height

The loop compares the scroll height before and after each scroll. When the height stops changing, no new content is loading and the loop exits. You may want to add a maximum iteration cap to avoid infinite loops on pages that continuously load content.

Scroll to a Specific Element

Sometimes you need to bring a particular element into the viewport (for example, a lazy-loaded image or a "Load More" button):

element = driver.find_element(By.ID, "footer-section")
driver.execute_script("arguments[0].scrollIntoView({behavior: 'smooth'});", element)

Triggering Hidden Actions

JavaScript execution is also useful for clicking elements that are obscured by overlays, removing sticky headers that interfere with screenshots, or extracting data embedded in JavaScript variables:

data = driver.execute_script("return window.__INITIAL_STATE__;")

If the site stores structured data in a global JS object (common in React and Next.js applications), grabbing it directly is faster than parsing the rendered DOM. You get a Python dict back from execute_script, which you can process immediately without any HTML parsing.

Taking Screenshots for Debugging

When a scraper fails silently or returns unexpected results, a screenshot of the page state at the moment of failure is invaluable.

driver.save_screenshot("debug_screenshot.png")

You can also capture a specific element:

element = driver.find_element(By.ID, "captcha-container")
element.screenshot("captcha_element.png")

Save screenshots inside your error-handling blocks so you can visually inspect what the browser was rendering when something went wrong. In headless mode, this is especially important because there is no visible window to glance at. Pair screenshots with logging of driver.current_url and driver.page_source[:500] for a complete debugging snapshot.

For long-running scraping pipelines, consider saving timestamped screenshots at key checkpoints (after login, after pagination, before data extraction) so you can trace exactly where a run diverged from the expected path.

Handling Pagination Across Multiple Pages

Most sites spread data across multiple pages, and a production-grade scraper needs to follow those pagination links automatically. There are two common patterns: URL-parameter pagination and click-based pagination.

URL-Parameter Pagination

If the site uses query strings like ?page=2, you can construct URLs directly:

all_results = []
for page_num in range(1, 50):
    driver.get(f"https://example.com/listings?page={page_num}")
    WebDriverWait(driver, 10).until(
        EC.presence_of_element_located((By.CSS_SELECTOR, ".listing-card"))
    )
    items = driver.find_elements(By.CSS_SELECTOR, ".listing-card")
    if not items:
        break  # No results means we passed the last page
    for item in items:
        all_results.append({
            "title": item.find_element(By.CSS_SELECTOR, "h2").text,
            "price": item.find_element(By.CSS_SELECTOR, ".price").text,
        })

The if not items: break check is the simplest last-page detection: when a page returns zero results, you stop. An alternative approach is to check whether the current page number exceeds the total indicated in the pagination widget, or to look for a "next page" link and stop when it disappears.

Click-Based Pagination

Some sites load the next page via JavaScript when you click a "Next" button:

from selenium.common.exceptions import NoSuchElementException

all_results = []
while True:
    items = driver.find_elements(By.CSS_SELECTOR, ".listing-card")
    for item in items:
        all_results.append(item.find_element(By.CSS_SELECTOR, "h2").text)

    try:
        next_btn = driver.find_element(By.CSS_SELECTOR, "a.next-page")
        if "disabled" in next_btn.get_attribute("class"):
            break
        next_btn.click()
        WebDriverWait(driver, 10).until(EC.staleness_of(items[0]))
    except NoSuchElementException:
        break

The staleness_of condition waits until the old elements are detached from the DOM, confirming the new page has loaded. Checking for a "disabled" class on the next button handles the final page gracefully.

Both patterns need a clear termination condition. Without one, your scraper will either loop forever or crash on the last page. Always test your pagination logic against the boundary: what happens on the very last page?

Scraping Data from Multiple URLs

When your target data lives on separate detail pages (for example, a product listing that links to individual product pages), you typically scrape in two passes: collect the URLs from the listing, then visit each one.

# Pass 1: Collect detail URLs from the listing page
driver.get("https://example.com/catalog")
links = driver.find_elements(By.CSS_SELECTOR, "a.product-link")
detail_urls = [link.get_attribute("href") for link in links]

# Pass 2: Visit each detail URL and extract data
products = []
for url in detail_urls:
    try:
        driver.get(url)
        WebDriverWait(driver, 10).until(
            EC.presence_of_element_located((By.CSS_SELECTOR, ".product-detail"))
        )
        products.append({
            "name": driver.find_element(By.CSS_SELECTOR, "h1.product-name").text,
            "description": driver.find_element(By.CSS_SELECTOR, ".description").text,
            "url": url,
        })
    except Exception as e:
        print(f"Skipped {url}: {e}")
        continue

driver.quit()

Reuse the same WebDriver instance throughout. Launching a new browser for every URL wastes startup time and memory. Wrapping the inner loop in a try/except ensures a single broken page does not crash your entire scrape.

This master-detail pattern is one of the most practical python selenium scrape website workflows. It combines well with the pagination loop from the previous section to crawl an entire catalog. Collect all listing-page URLs across pagination first, then iterate through the detail pages in a second pass.

For large URL lists, consider adding a short delay between requests (0.5 to 2 seconds) to stay within the site's rate limits and reduce the chance of triggering anti-bot defenses. You can randomize the delay slightly to make your request pattern less predictable.

Extracting and Parsing HTML Tables

Tabular data is one of the most structured (and therefore easiest) targets for web scraping with Selenium. Here is a generic pattern that works on any standard HTML table:

table = driver.find_element(By.CSS_SELECTOR, "table#stats")

# Extract headers
headers = [th.text for th in table.find_elements(By.CSS_SELECTOR, "thead th")]

# Extract rows
rows = []
for tr in table.find_elements(By.CSS_SELECTOR, "tbody tr"):
    cells = [td.text for td in tr.find_elements(By.TAG_NAME, "td")]
    rows.append(dict(zip(headers, cells)))

This gives you a list of dictionaries where each key is a column header and each value is the corresponding cell text. It is a clean, predictable structure that plugs directly into your export pipeline.

If the table is large or you plan to do further analysis, handing off to pandas is more efficient:

import pandas as pd

html = driver.page_source
tables = pd.read_html(html, attrs={"id": "stats"})
df = tables[0]

pd.read_html handles colspan, rowspan, and nested tables more gracefully than manual element iteration. Use the Selenium-driven page_source to feed it the fully rendered HTML that includes any data injected by JavaScript.

Watch out for tables that load rows dynamically as you scroll. In those cases, you need to scroll the table container (not just the page) to trigger the lazy load before extracting the rows. Some financial and analytics sites use virtualized tables that only render visible rows, which requires scrolling incrementally to capture the full dataset.

Combining Selenium with BeautifulSoup for Faster Parsing

Selenium is great at rendering pages, but its element-lookup methods are relatively slow because every call crosses the WebDriver protocol boundary. A common performance trick is to let Selenium handle the rendering, then hand the finished HTML to BeautifulSoup for parsing.

from bs4 import BeautifulSoup

driver.get("https://example.com/products")
WebDriverWait(driver, 10).until(
    EC.presence_of_element_located((By.CSS_SELECTOR, ".product-grid"))
)

soup = BeautifulSoup(driver.page_source, "html.parser")
cards = soup.select(".product-card")

for card in cards:
    title = card.select_one("h3").get_text(strip=True)
    price = card.select_one(".price").get_text(strip=True)
    print(title, price)

This selenium beautifulsoup web scraping pattern gives you the best of both worlds: Selenium executes JavaScript so the DOM is complete, and BeautifulSoup parses the static HTML snapshot in memory without any network round-trips. On pages with hundreds of elements, the speed difference is noticeable.

The workflow is simple: use Selenium for navigation and JavaScript execution, then switch to BeautifulSoup (or lxml) the moment you have the page_source. This reduces the number of WebDriver calls from hundreds to one. If you are new to BeautifulSoup, a guide on extracting and parsing web data with BeautifulSoup is a useful companion to this tutorial.

Exporting Scraped Data to CSV and JSON

Raw data sitting in a Python list is only useful while your script is running. You will almost always want to persist it.

CSV Export

import csv

fieldnames = ["title", "price", "url"]
with open("products.csv", "w", newline="", encoding="utf-8") as f:
    writer = csv.DictWriter(f, fieldnames=fieldnames)
    writer.writeheader()
    writer.writerows(all_results)

JSON Export

import json

with open("products.json", "w", encoding="utf-8") as f:
    json.dump(all_results, f, indent=2, ensure_ascii=False)

Pandas Shortcut

If you are already using pandas, a one-liner handles either format:

import pandas as pd

df = pd.DataFrame(all_results)
df.to_csv("products.csv", index=False)
df.to_json("products.json", orient="records", indent=2)

Choose CSV when downstream tools expect flat tabular data (spreadsheets, SQL imports). Choose JSON when your data is nested or you need to preserve types like arrays and objects. For very large datasets, consider writing rows incrementally instead of accumulating everything in memory first. The csv.DictWriter approach naturally supports incremental writes because you can flush after each row.

Cleaning and Validating Scraped Data

Scraped data is rarely analysis-ready straight out of the browser. Duplicate rows, missing fields, and inconsistent formatting are the norm, not the exception.

import pandas as pd

df = pd.DataFrame(all_results)

# Remove exact duplicate rows
df.drop_duplicates(inplace=True)

# Drop rows where critical fields are missing
df.dropna(subset=["title", "price"], inplace=True)

# Normalize price strings to floats
df["price"] = (df["price"]
               .str.replace(r"[^0-9.]", "", regex=True)
               .astype(float))

# Strip extra whitespace from text fields
df["title"] = df["title"].str.strip()

This cleaning step bridges the gap between raw scraped output and data that is actually useful for analysis, reporting, or feeding into a database. Running these checks before export catches issues early, rather than discovering bad data downstream.

Common validation checks worth adding include verifying that URLs are well-formed, that numeric fields fall within expected ranges (a product price of $0.00 might be a parsing error), and that required text fields are not empty strings disguised as present values. Building a small validation function that runs after each scraping session makes your pipeline more robust over time.

Using Proxies with Selenium to Avoid Blocks

If you send too many requests from a single IP address, the target site will eventually block you. Proxies distribute your traffic across different IPs, reducing the chance of bans and enabling access to geo-restricted content.

Manual Proxy Configuration

from selenium import webdriver

options = webdriver.ChromeOptions()
options.add_argument("--proxy-server=http://123.45.67.89:8080")

driver = webdriver.Chrome(options=options)
driver.get("https://httpbin.org/ip")
print(driver.find_element(By.TAG_NAME, "body").text)
driver.quit()

This approach works for a single proxy, but rotating through a pool manually (launching a new driver per IP) is tedious and slow. Datacenter proxies are cheaper but easier for sites to detect, while residential proxies route traffic through real consumer IPs and are much harder to distinguish from genuine visitors.

Authenticated Proxies

Many proxy providers require username/password authentication. Chrome does not natively support proxy auth through command-line flags, so you need a workaround. One common method is a lightweight browser extension that injects credentials into the proxy handshake automatically. Another option is to run a local proxy (such as mitmproxy) that adds the auth header and forward-chains to the remote proxy.

When to Use a Managed Proxy Service

Maintaining your own proxy pool, handling rotation logic, and dealing with banned IPs is operational overhead that grows with scale. Managed proxy services give you a single endpoint that handles rotation, authentication, and IP health behind the scenes. This is particularly useful for selenium proxy web scraping at production volumes where you need hundreds of rotating IPs across different geographies.

For tips on staying unblocked, the strategies covered in guides about avoiding IP bans during web scraping apply directly to Selenium-based setups as well. Key practices include rotating user agents alongside IPs, adding randomized delays between requests, and respecting robots.txt directives.

Detecting and Avoiding Honeypot Traps

A honeypot is a hidden HTML element that is invisible to human visitors but exposed to bots. If your scraper interacts with it (clicks a hidden link, fills a hidden form field), the site flags your session as automated and may block you immediately.

The most common pattern is a form field styled with display:none or visibility:hidden:

hidden_inputs = driver.find_elements(
    By.CSS_SELECTOR, "input[style*='display:none'], input[style*='visibility:hidden']"
)

for inp in hidden_inputs:
    print(f"Honeypot detected: name={inp.get_attribute('name')}")

Defensive coding rules for honeypots:

  • Never blindly iterate over all form fields and fill them. Check visibility first.
  • Use element.is_displayed() before interacting with any element you did not explicitly target.
  • If a link has opacity: 0 or is positioned off-screen with negative coordinates, skip it.
  • Some honeypots use CSS classes rather than inline styles. Inspect the computed style with execute_script if you suspect the site uses external CSS to hide trap elements.

Honeypot awareness becomes especially important when your scraper fills out forms (search inputs, login fields, contact forms). A simple visibility check before each interaction adds minimal overhead and avoids a class of detection that is otherwise hard to debug.

Performance Optimization Tips

Selenium drives a full browser, so every optimization that reduces what the browser has to do translates directly into faster, cheaper scraping runs.

Run in headless mode. Removing the GUI layer cuts startup time and memory usage significantly. Use --headless=new in your Chrome options. A headless browser guide covers the nuances in depth.

Block unnecessary resources. Images, fonts, and CSS files add load time without contributing data. You can use Chrome DevTools Protocol commands to block them:

driver.execute_cdp_cmd("Network.setBlockedURLs", {
    "urls": ["*.jpg", "*.png", "*.gif", "*.svg", "*.woff2", "*.css"]
})
driver.execute_cdp_cmd("Network.enable", {})

Prefer fast locators. ID-based lookups are the quickest. Complex XPath expressions that traverse large subtrees cost more. When you have a choice, use By.ID or a short CSS selector.

Tune your waits. Overly generous implicit waits slow down every single element lookup. Use targeted explicit waits with WebDriverWait and set timeouts based on the specific page's behavior, not a blanket 30-second fallback.

Minimize browser restarts. Reuse a single driver instance across pages whenever possible. Each webdriver.Chrome() call spawns an entire browser process.

Disable features you do not need. Flags like --disable-extensions, --disable-infobars, and --blink-settings=imagesEnabled=false trim browser overhead further.

Page load strategy. Set options.page_load_strategy = "eager" to stop waiting for images and stylesheets to finish loading. The DOM is interactive sooner, and you can begin extraction earlier.

These optimizations compound. Applying all of them together can cut a selenium headless scraping job's runtime by 50% or more compared to a default configuration.

Common Challenges and How to Solve Them

Even with a well-configured scraper, you will run into issues. Here are the most frequent problems and their fixes.

Challenge

Cause

Solution

NoSuchElementException

Element has not loaded yet

Use WebDriverWait with an appropriate expected condition

Stale element reference

DOM changed after you located the element

Re-locate the element after any page navigation or AJAX reload

CAPTCHA blocks

Site detects automated traffic

Slow down requests, rotate user agents, use residential proxies

Inconsistent data

Page layout varies across products/categories

Add defensive checks with find_elements and test list length before accessing

Memory leaks in long runs

Browser accumulates state over hundreds of pages

Restart the driver periodically (every N pages) or clear cookies/cache

Slow execution

Full browser rendering overhead

Apply the optimization tips from the previous section

Error handling pattern: Wrap your scraping loop in a try/except that catches WebDriverException as a broad fallback. Log the URL, save a screenshot, and continue to the next item rather than crashing the entire job.

from selenium.common.exceptions import WebDriverException

for url in urls:
    try:
        driver.get(url)
        # ... extraction logic ...
    except WebDriverException as e:
        driver.save_screenshot(f"error_{url.split('/')[-1]}.png")
        print(f"Failed on {url}: {e}")
        continue

If you are seeing intermittent failures on a site that normally works, check whether the site is serving different content based on geolocation, user agent, or time of day. Logging the full page source on failure (in addition to the screenshot) helps diagnose these kinds of environmental issues. Bypassing Cloudflare and similar protection services with Selenium requires additional techniques beyond basic configuration.

Scaling with Selenium Grid

A single Selenium instance is limited to one browser at a time. When you need to scrape thousands of pages in parallel, Selenium Grid distributes browser sessions across multiple machines.

How Grid Works

Selenium Grid uses a hub-and-node architecture. The hub is a central server that receives WebDriver requests and routes them to available nodes, each of which runs one or more browser instances. You point your script at the hub URL instead of a local driver:

from selenium import webdriver

options = webdriver.ChromeOptions()
driver = webdriver.Remote(
    command_executor="http://grid-hub:4444/wd/hub",
    options=options
)

You can run the hub and nodes using Docker, which makes scaling straightforward:

docker run -d -p 4444:4444 selenium/hub
docker run -d --link selenium-hub:hub selenium/node-chrome

Practical Considerations

Running dozens of parallel browser sessions consumes serious CPU and RAM. Monitor your nodes and set a max-session cap to prevent overload. Debugging is also harder in a distributed setup because screenshots and logs are on remote machines. Use Grid's built-in video recording feature or centralized logging to keep visibility.

Selenium Grid is a solid choice for selenium grid web scraping workloads that need moderate parallelism (5 to 20 concurrent sessions). Beyond that, the operational burden of managing nodes, handling failures, and monitoring resource usage grows quickly. For teams that do not want to manage Grid infrastructure, cloud-hosted browser services or API-based scraping tools provide the same parallel execution model as a managed service.

Selenium vs. Playwright vs. Puppeteer: Quick Comparison

Selenium is not the only browser automation tool. Playwright and Puppeteer are popular modern alternatives, each with different strengths.

Feature

Selenium

Playwright

Puppeteer

Language support

Python, Java, C#, JS, Ruby

Python, Java, .NET, JS/TS

JavaScript/TypeScript only

Browser engines

Chrome, Firefox, Edge, Safari

Chromium, Firefox, WebKit

Chromium only

Auto-wait

Manual (explicit/implicit waits)

Built-in auto-wait on actions

Manual (waitForSelector)

Speed

Slower (WebDriver protocol)

Faster (CDP / browser channels)

Faster (CDP)

Parallel execution

Via Selenium Grid

Native browser contexts

Via page/browser contexts

Community

Largest, most mature

Growing fast

Large (Chromium-focused)

Choose Selenium when you need multi-language support, cross-browser testing compatibility, or when your team already knows the Selenium API. Choose Playwright if you want built-in auto-wait, modern async patterns, and multi-browser support from a single library. Choose Puppeteer if your stack is JavaScript-only and you only need Chromium.

All three tools can handle browser-driven scraping, but Playwright's built-in auto-wait and native browser contexts for parallelism give it an edge for new projects that do not need Selenium's broader language ecosystem. For a deeper dive into Playwright's scraping capabilities, resources on Playwright web scraping provide a thorough comparison.

Rendering JavaScript Without a Browser: API-Based Alternatives

Running a full browser works, but it is expensive in terms of CPU, RAM, and engineering maintenance. When your goal is simply to get the rendered HTML of a JavaScript-heavy page, an API-based approach can be far more efficient.

Managed scraping APIs accept a URL and return the fully rendered HTML (or even pre-parsed JSON). Behind the scenes, they handle browser rendering, proxy rotation, CAPTCHA solving, and retry logic. You send a single HTTP request and get clean data back, which means your scraping code stays as simple as a requests.get() call.

This model shines when:

  • You are scraping at scale and do not want to manage Selenium Grid infrastructure.
  • Anti-bot systems are aggressive and require residential proxy rotation plus browser fingerprint management.
  • You want to decouple your parsing logic from the rendering layer entirely.
  • Your team does not have the DevOps capacity to maintain browser and driver versions across environments.

The tradeoff is control. With Selenium, you can click buttons, fill forms, and navigate multi-step workflows. API-based renderers typically handle single-page fetches. For complex interactive scraping (login flows, multi-step wizards), Selenium or a similar browser automation tool is still the better fit.

A hybrid approach works well in practice: use Selenium locally during development to understand the page structure and build your selectors, then switch to an API-based service in production to avoid the operational overhead of running browsers at scale. This gives you the flexibility of web scraping with Selenium during prototyping and the reliability of a managed service in production. You keep the same parsing code either way; only the data-fetching layer changes.

Complete Example: End-to-End Web Scraping with Selenium Project

Let us tie everything together into a single, runnable script. This example scrapes book titles and prices from a paginated demo site, cleans the data, and exports it to CSV.

import csv
import time
from selenium import webdriver
from selenium.webdriver.common.by import By
from selenium.webdriver.support.ui import WebDriverWait
from selenium.webdriver.support import expected_conditions as EC

# --- Setup ---
options = webdriver.ChromeOptions()
options.add_argument("--headless=new")
options.add_argument("--window-size=1920,1080")
options.add_argument("--disable-gpu")
driver = webdriver.Chrome(options=options)

all_books = []
base_url = "https://books.toscrape.com/catalogue/page-{}.html"

# --- Scrape with Pagination ---
for page in range(1, 51):
    driver.get(base_url.format(page))
    try:
        WebDriverWait(driver, 10).until(
            EC.presence_of_element_located((By.CSS_SELECTOR, ".product_pod"))
        )
    except Exception:
        break  # No more pages

    books = driver.find_elements(By.CSS_SELECTOR, ".product_pod")
    if not books:
        break

    for book in books:
        title = book.find_element(By.CSS_SELECTOR, "h3 a").get_attribute("title")
        price = book.find_element(By.CSS_SELECTOR, ".price_color").text
        all_books.append({"title": title, "price": price})

driver.quit()

# --- Clean ---
seen = set()
cleaned = []
for book in all_books:
    key = (book["title"], book["price"])
    if key not in seen:
        seen.add(key)
        price_str = book["price"].replace("\xa3", "").strip()
        try:
            book["price"] = float(price_str)
        except ValueError:
            continue
        cleaned.append(book)

# --- Export ---
with open("books.csv", "w", newline="", encoding="utf-8") as f:
    writer = csv.DictWriter(f, fieldnames=["title", "price"])
    writer.writeheader()
    writer.writerows(cleaned)

print(f"Scraped {len(cleaned)} books to books.csv")

This script demonstrates the full lifecycle covered in this tutorial: headless Chrome configuration, explicit waits, element location with CSS selectors, pagination with last-page detection, deduplication, data type normalization, and CSV export. You can adapt it to any target by swapping out the URL pattern and CSS selectors.

The key design decisions in this example are worth noting. We use --headless=new for speed. We wrap the wait in a try/except to handle the page-not-found case gracefully. We deduplicate by tracking seen title/price pairs in a set. And we normalize prices to floats before export so downstream tools can sort and filter numerically.

From here, you could extend this script by adding proxy rotation, writing results to a database instead of CSV, or deploying it on a schedule with a task runner like cron or Airflow. The patterns you have learned throughout this tutorial snap together like building blocks.

Key Takeaways

  • Use Selenium when JavaScript rendering is required. For static HTML pages, lighter tools like requests plus BeautifulSoup or Scrapy are faster and cheaper to run.
  • Always use explicit waits instead of time.sleep(). WebDriverWait with expected_conditions makes your scraper both faster and more reliable on dynamic pages.
  • Block unnecessary resources and run headless. Disabling images, fonts, and CSS in headless mode can cut execution time in half without losing any scraped data.
  • Clean your data before exporting. Deduplication, null handling, and type normalization catch problems early and save debugging time downstream.
  • Plan for scale from the start. Proxy rotation, Selenium Grid, and API-based rendering alternatives keep your scraper running as target sites grow more defensive.

FAQ

Is Selenium good for large-scale web scraping?

It can work, but it is resource-intensive. Each browser instance consumes significant CPU and RAM, so running hundreds of parallel sessions requires serious infrastructure. Selenium Grid helps distribute load across machines, and headless mode reduces per-session overhead. For truly large-scale jobs (millions of pages), API-based rendering services or frameworks designed for crawling are often more cost-effective.

Can Selenium scrape websites that require login authentication?

Yes. You can automate the full login flow: navigate to the login page, locate the username and password fields with find_element, enter credentials with send_keys, and click the submit button. After authentication, Selenium maintains the session cookies so subsequent page loads remain authenticated throughout the session.

How do I handle CAPTCHAs when scraping with Selenium?

CAPTCHAs are designed to stop automation, so there is no clean workaround within the browser itself. Common strategies include slowing request rates to avoid triggering CAPTCHAs in the first place, using residential proxies to reduce detection, and integrating third-party CAPTCHA-solving services that return tokens you inject into the page via JavaScript.

Legality depends on the jurisdiction, the website's terms of service, and the type of data collected. In the United States, the hiQ v. LinkedIn Supreme Court decision clarified that scraping publicly available data is not necessarily a violation of the CFAA. However, scraping personal data may implicate GDPR in the EU. Always review the target site's robots.txt and terms of service, and consult legal counsel for commercial scraping projects.

What is the difference between Selenium and BeautifulSoup?

They solve different problems. Selenium controls a real browser and can execute JavaScript, click buttons, and navigate interactive pages. BeautifulSoup is a parser that takes an HTML string and gives you methods to query and extract data from it, but it cannot load pages or run JavaScript. Many scrapers combine both: Selenium renders the page, then BeautifulSoup parses the HTML snapshot for faster extraction.

Conclusion

Web scraping with Selenium gives you the ability to extract data from virtually any website, including JavaScript-heavy applications that static HTTP libraries cannot handle. Throughout this tutorial, you have seen how to set up the environment, configure the browser, locate and interact with elements, handle dynamic content with explicit waits, paginate across result sets, and export clean data.

The key tradeoff with Selenium is resource cost. A real browser consumes more CPU and memory than a lightweight HTTP request, and that cost multiplies when you scale. For many scraping scenarios, the practical path forward is to use Selenium for development and prototyping, then offload the rendering and anti-bot complexity to a dedicated service when you move to production.

If you find yourself spending more time managing proxies, battling CAPTCHAs, and maintaining browser infrastructure than writing actual parsing logic, WebScrapingAPI can handle the rendering and delivery layer for you, so you can focus on the data itself. That separation of concerns keeps your codebase clean and your scraping pipeline reliable.

Whatever tool you choose, start with the lightest solution that works for your use case, add complexity only when you need it, and always respect the target site's terms of service.

About the Author
Robert Sfichi, Full-Stack Developer @ WebScrapingAPI
Robert SfichiFull-Stack Developer

Robert Sfichi is a team member at WebScrapingAPI, contributing to the product and helping build reliable solutions that support the platform and its users.

Start Building

Ready to Scale Your Data Collection?

Join 2,000+ companies using WebScrapingAPI to extract web data at enterprise scale with zero infrastructure overhead.