Unblock Websites and Protect Your Identity with Proxies and Axios Node.js
Suciu Dan on Apr 25 2023

What is Axios?
Axios is a popular, promise-based HTTP client library that allows you to make HTTP requests in Node.js. It is lightweight and easy to use, making it a great choice for web scraping projects.
Axios supports a wide range of features, such as proxies, automatic conversion of JSON data, support for canceling requests, and support for interceptors, which allows you to handle tasks like authentication and error handling.
What are proxies?
Proxies, also known as proxy servers, act as intermediaries between a client (such as a web browser or a scraper) and a target server (such as a website).
The proxy receives requests from the client and forwards them to the target server. The target server then sends the response back to the proxy, which in turn sends it back to the client.
In web scraping, you can use proxies to conceal the IP address of the scraper, so that the website you are scraping does not detect and block the request. Additionally, using multiple proxies can help to prevent detection and avoid getting blocked.
Some proxy providers offer to rotate IP options, so you can rotate the proxies to avoid being blocked.
Prerequisites
To use a proxy with Axios and Node.js, you'll need to have Node.js and npm (Node Package Manager) installed on your computer. If you haven't already done so, you can download and install them from the Node.js website.
Once you install Node.js and npm, open the terminal, create a new folder for the project, and run the `npm init` command. Follow the instructions and create a base package.json file.
Install axios using this command:
npm install axios
Making an HTTP Request
Let’s make our first request with Axios. We will send a GET request to the ipify endpoint. The request will return our IP address.
Create an index.js file and paste the following code:
// Import axios

const axios = require('axios');

(async () => {

    // For storing the response

    let res

    try {

   	 // Make a GET request with Axios

   	 res = await axios.get('https://api.ipify.org?format=json')

   	 // Log the response data

   	 console.log(res.data)

    } catch(err) {

   	 // Log the error

   	 console.log(err)

    }

    // Exit the process

    process.exit()

})()
We start by importing the axios library and utilise the get method to send a request to the api.ipify.org endpoint.
You can run the code by using the command `node index.js` in the terminal. The output should be displaying your IP address. Double check the result by accessing the URL in your browser.
Using Proxies with Axios
Before we’re writing any code, head to the Free Proxy List website and pick a proxy that’s closest to your location. In my case, I will pick a proxy for Germany.
The `get` method from axios supports a second parameter called options. Inside this parameter, we can define the proxy details.
Our previous GET request with a proxy will look like this:
res = await axios.get('https://api.ipify.org?format=json', {

    proxy: {

        protocol: 'http',

        host: '217.6.28.219',

        port: 80

    }

})
Upon running the code, you will observe that the returned IP address is different from your own. This is because the request is routed through a proxy server, thus shielding your IP address from detection.
What about authentication?
When subscribing to a premium proxy service, you will receive a username and password to use in your application for authentication.
Axios's `proxy` object has an auth property that can receive authentication credentials. An example of a GET request using this setup would appear as follows:
res = await axios.get('https://api.ipify.org?format=json', {

    proxy: {

        protocol: 'http',

        host: '217.6.28.219',

        port: 80,

        auth: {

            username: "PROVIDED_USER",

            password: "PROVIDED_PASSWORD"

        }

    }

})
Setting the proxy as an environment variable
An alternative way to configure a proxy in Axios is by setting the `http_proxy` or `https_proxy` environment variables. This method allows you to skip configuring proxy details within Axios commands, as they will be automatically obtained from environment variables.
For cross-platform compatibility, I recommend the installation of the `cross-env` package which implements an export-like command for Windows.
Install the package globally using this command:
npm install -g cross-env
Let’s clean the `axios.get` code and bring it to the initial version. The code should look like this:
res = await axios.get('https://api.ipify.org?format=json')Instead of simply running the code with node index.js, we will include the proxy URL in front of the command as follows:
cross-env https_proxy=http://217.6.28.219:80/ node index.js
The output of the script should be the IP address of the proxy, rather than your own. To confirm this, you can visit the ipify URL in your browser.
Rotating Proxies
Rotating proxies is a good idea because it helps to avoid detection and prevents websites from blocking your IP address. Websites can track and block IP addresses that make too many requests in a short period of time, or those associated with scraping activities.
We can use the Free Proxy List website to compile a list with proxies we can rotate with each `axios` request.
Please note that the list of proxies that you might find on the website might differ from the list that I have compiled. The list that I have created looks like this:
const proxiesList = [

    {

   	 protocol: 'http',

   	 host: '217.6.28.219',

   	 port: 80

    },

    {

   	 protocol: 'http',

   	 host: '103.21.244.152',

   	 port: 80

    },

    {

   	 protocol: 'http',

   	 host: '45.131.4.28',

   	 port: 80

    }

];
Alright, so let's put the `proxy` property back in the `axios` config. But instead of using just one proxy, we'll randomly pick one from our list of proxies. The code will look like this:
res = await axios.get('https://api.ipify.org?format=json', {

    proxy: proxiesList[Math.floor(Math.random() * proxiesList.length)]

})
This is the content of the index.js file:
// Import axios

const axios = require('axios');

const proxiesList = [

    {

   	 protocol: 'http',

   	 host: '217.6.28.219',

   	 port: 80

    },

    {

   	 protocol: 'http',

   	 host: '172.67.180.244',

   	 port: 80

    },

    {

   	 protocol: 'http',

   	 host: '45.131.4.28',

   	 port: 80

    }

];

(async () => {

    // For storing the response

    let res

    try {

   	 // Make a GET request with Axios

   	 res = await axios.get('https://api.ipify.org?format=json', {

   		 proxy: proxiesList[Math.floor(Math.random() * proxiesList.length)]

   	 })

   	 // Log the response data

   	 console.log(res.data)

    } catch(err) {

   	 // Log the error

   	 console.log(err)

    }

    // Exit the process

    process.exit()

})()
Using WebScrapingAPI Proxies
Using premium proxies from a service like WebScrapingAPI is better than using free proxies because they are more reliable, faster, and provide better security. Premium proxies are less likely to get blocked by websites and have lower latency.
In contrast, free proxies may be slow, unreliable, contain malware, and are prone to get blocked by websites.
Want to try out WebScrapingAPI? No problem, just sign up for our 14-day free trial and you'll get access to all the cool features and even get 5,000 credits to play around with.
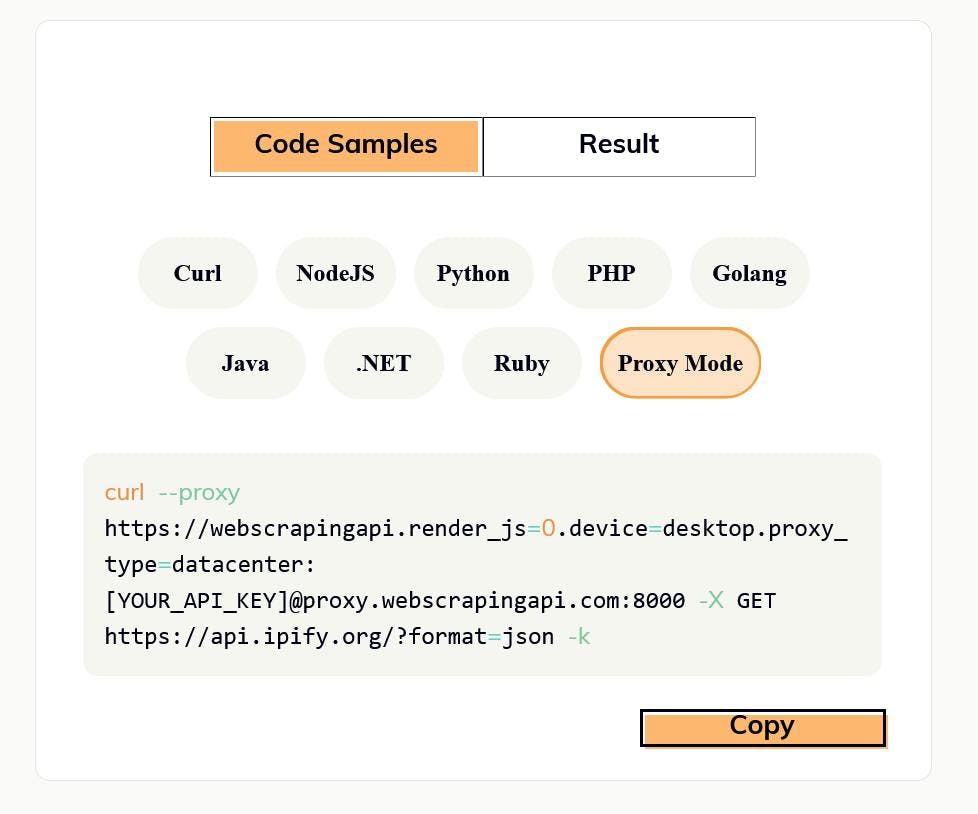
Once you have an account, head over to the API Playground and select the Proxy Mode tab in the Code Samples section

Let’s use the Proxy URL in our code. The axios GET request will look like this:
res = await axios.get('https://api.ipify.org?format=json', {

    proxy: {

        host: 'proxy.webscrapingapi.com',

        port: 80,

        auth: {

            username: 'webscrapingapi.render_js=0.device=desktop.proxy_type=datacenter',

            password: '[YOUR_API_KEY]'

        }

    }

})
The `username` property allows you to enable or disable specific API features. Keep in mind that you must also set your API key in the `password` property. You can check the full documentation here.
Each time you run this code, you will receive a different IP address, as WebScrapingAPI rotates IPs with every request. You can learn more about this feature by reading the documentation on Proxy Mode.
Additionally, you have the option to switch between datacenter and residential proxies. Find more information about the different types of proxies we offer, by visiting the proxies documentation.
Conclusion
Using a proxy is an important aspect of web scraping, as it allows you to hide your IP address and access blocked websites. Axios is a powerful library for scraping data, and when combined with a reliable proxy, you can achieve efficient and fast data extraction.
By using a premium proxy service like WebScrapingAPI, you will have access to a wide range of features, including IP rotation and the option to switch between datacenter and residential proxies.
We hope that this article has provided you with a useful understanding of using a proxy with Axios and Node.js and how it could be beneficial to your scraping needs. Feel free to sign up for our 14-day free trial, to test our service and explore all the features and functionalities.
News and updates
Stay up-to-date with the latest web scraping guides and news by subscribing to our newsletter.
We care about the protection of your data. Read our Privacy Policy.

Related articles

Explore the complexities of scraping Amazon product data with our in-depth guide. From best practices and tools like Amazon Scraper API to legal considerations, learn how to navigate challenges, bypass CAPTCHAs, and efficiently extract valuable insights.


Learn what’s the best browser to bypass Cloudflare detection systems while web scraping with Selenium.


Learn how to scrape HTML tables with Golang for powerful data extraction. Explore the structure of HTML tables and build a web scraper using Golang's simplicity, concurrency, and robust standard library.
