Web Scraping with Python: The Ultimate Guide to Building Your Scraper
Raluca Penciuc on Mar 30 2021
If in the 20th century we dealt with a “time is money” mindset, now it’s all about data. More data means more insights, so better decisions, and more money.
Web scraping and web scrapers hugely increased in popularity in the last decade especially. More and more businesses need an accurate marketing strategy, which implies vast amounts of information in a short amount of time.
With the new spotlight shining on data extraction, companies are starting to see ways in which they can benefit. For developers, it could be a good way to boost their business or just a neat project to hone their coding skills.
Even if your work has nothing to do with web scraping, but you are a Python team player, at the end of this article, you will learn about a new niche where you can make great use of your skills. We will see how we can build our own Web Scraping with Python.
Understanding Web Scraping with Python
But first, what does web scraping mean? On the most basic level, a web scraper extracts the data from a website, provided that not all of them offer their data under a public API.
This process is more useful than it seems if you consider that the more information you have, the better decisions you take in your business.
Nowadays, websites are more and more content loaded, so performing this process entirely by hand is far from a good idea. That is where building an automated tool for scraping comes into the discussion.
“What do I need the data for?” you may ask. Well, let’s have a look at some of the top use cases where web scraping is a lifesaver:
- Price intelligence: an e-commerce company will need information about competitors’ prices to make better pricing and marketing decisions.
- Market research: market analysis means high quality, high volume, and insightful information.
- Real estate: individuals or businesses need to aggregate offers from multiple sources.
- Lead generation: finding clients for your on-growing business.
- Brand monitoring: companies will analyze forums, social media platforms, and reviews to track how their brand is perceived.
- Minimum advertised price (MAP) monitoring ensures that a brand’s online prices correspond with its pricing policy.
- Machine learning: developers need to provide training data for their AI-powered solutions to function correctly.
You can find more use cases and a more detailed description of them here.
“Cool, let’s get it started!” you may say. Not so fast.
Even if you figure out how web scraping works and how it can improve your business, it’s not so easy to build a web scraper. For starters, some people don’t want a scraper on their websites for different reasons.
One of them would be that scraping means many requests are sent in a second, which can overload the server. Website owners can consider this sometimes as a hacker’s attack (denial of service), so websites adopt measures to protect themselves by blocking the bots.
Some of these measures can be:
- IP blocking: this happens when a website detects a high number of requests from the same IP address; the website can ban you entirely from accessing it or significantly slow you down).
- CAPTCHAs (Completely Automated Public Turing tests to tell Computers and Humans Apart): are logical problems pretty trivial to solve for people but a headache for scrappers.
- Honeypot: integrated links invisible to humans but visible to bots; once they fall into the trap, the website blocks their IP.
- Login required: websites may hide some information you need behind a login page; even if you authenticate on the website, the scraper does not have access to your credentials or browser cookies.
Some websites may not implement these techniques, but the simple fact that they want a better user experience using Javascript makes a web scraper’s life harder.
When a website uses Javascript or an HTML-generation framework, some of the content is accessible only after some interactions with the website are made or after executing a script (usually written in Javascript) that generates the HTML document.
Let’s also consider the quality of the data extracted. For example, on an e-commerce website, you may see different prices according to the region where you live. This data is not very accurate, so the bot must find a way to extract the data as accurately as possible.
If you manage to overcome all these, you still need to consider that website’s structure can always suffer changes. After all, a website needs to be user-friendly, not bot-friendly, so our automated tool must adapt to these changes.
In this never-ending scraping war, bots come up with solutions on their own. The scope of all of them is to recreate human behavior on the internet as best as possible.
For example, you can avoid IP blocking by using IP proxy services. It is better to use paid services because the free ones make their IPs public so that a website may block them.
You can integrate CAPTCHA solvers as well. They will help you achieve continuous data feeds but will slightly slow down the process of scraping.
As a solution to honeypot traps, you can use XPath (or even regular expressions if you are bold enough) to scrape specified items instead of the whole HTML document.
Considering all these issues and how to overcome them can become a painstaking and time-consuming process. That is why in the last decade, web scraping APIs gained more and more attention.
Here, on WebScrapingAPI, we collect the HTML content from any website, managing any possible challenge (like the ones mentioned earlier). Also, we use Amazon Web Services, so speed and scalability are not a problem. Are you tempted to give it a try? You can start with a free account, which offers you 1000 API calls per month. Dope, right?
Understanding the Web
But now, let’s get back to the purpose of this article. We want to learn how to build a web scraper using Python.
The first must-know concept is the Hypertext Transfer Protocol (HTTP), which explains the communication between a server and a client. The idea behind that is pretty straightforward. The client (application) sends a message (HTTP request) to the server, and the server returns a response.
The message contains multiple information that describes the client and how it will process the data: method, HTTP version, and headers.
In web scraping, the most used method for an HTTP request is GET. That says that you are going to retrieve the data you request. If you want to know more about them, you can find here a complete and detailed list.
Headers include additional information about the HTTP request or response. We will talk about the most relevant ones in web scraping, but you can consult the full list.
- User-Agent: used to identify the application, operating system, software, and its version; a web scraper uses this header to make requests appear more realistic.
- Cookie: contain stateful information about the request (for example, the authentication token).
- Host: specifies the server’s domain name and, eventually, the port number on which the server is listening.
- Referrer: contains the source site where the user came from; according to that, the content displayed can be different, so a web scraper has to take this into account as well.
- Accept: notifies the server what type of content can return in response; it is often overlooked in web scraping, although it can offer a more organic communication between client and server.
Understanding Python
Python is a general-purpose and high-level programming language that manages to keep itself in developers’ preferences for multiple reasons:
- Readable code: its simple syntax makes it a perfect choice for beginners.
- Programming paradigms: object-oriented, structured, functional, and aspect-oriented programming are just a few examples.
- Robust standard library: wide range of modules for every need
- Active community: many open-source libraries and tools
Good, with these said, let’s prepare our workspace. First of all, we need Python3. You can download and install it from here.
This tutorial is IDE-agnostic, so feel free to choose whatever you are comfortable with. We prefer Visual Studio Code because it is lightweight and available for multiple languages.
We are also going to use a bunch of Python libraries:
- requests: to make an HTTP request
- beautifulsoup: to parse the HTML document
- selenium: to scrape dynamic content
- nltk (optional): to process natural language
You do not have to install them all beforehand because there are more details and installation instructions at every step.
Now, let’s start scraping the Web!
Making your own web scraper
To make things easier for you, the tutorial will be broken down into steps. Also, you’ll see some bonus steps marked with .1 after the number. These act as alternatives that you might be interested in.
Step 1: Inspect the page you want to scrape
Alright, enough chit-chat, let’s dig into it.
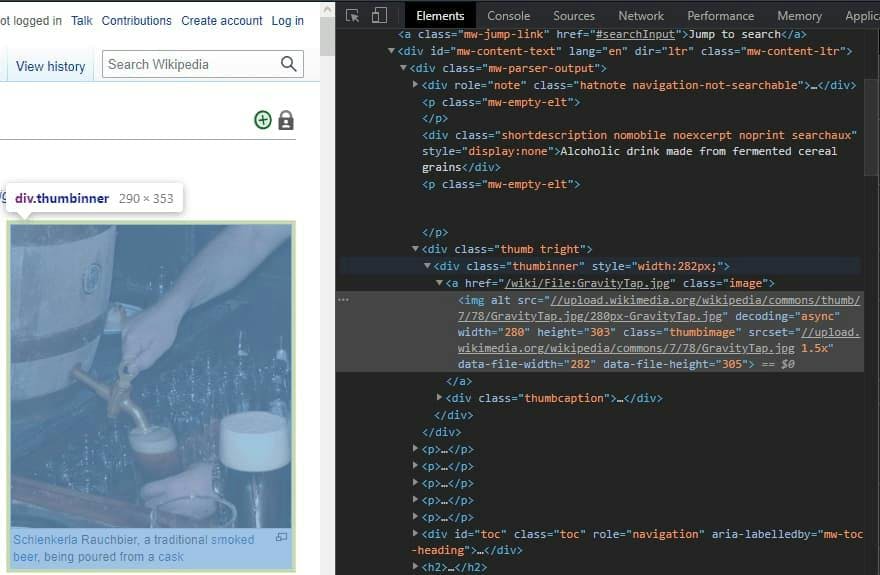
First, we need to pick a website we want to scrape. For the sake of illustrating the principles, let’s choose a simple educational website: https://en.wikipedia.org/wiki/Beer.
In this step, we only want to check the page’s HTML document to gain a brief idea about its structure. It does not matter what browser or operating system you use in this step; the process is the same. Right-click anywhere, over an image, a link, or a simple block of text, and then choose the “Inspect element” option.
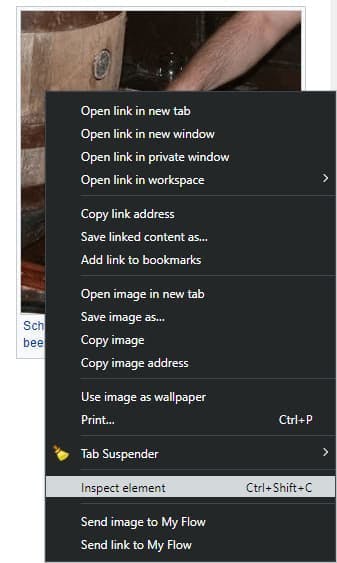
The “Elements” tab is the only thing we will have in focus. Depending on the website, you can see a lot of HTML code. It is important not to get overwhelmed by it but to check only the data you are interested in.
Step 2: Send an HTTP request
Now we can start writing the code for our web scraper. We simply begin by making an HTTP request to our website to return the full HTML code we just saw in the browser. How would that look like in code? Well, stunning! We are talking about Python, after all.
Let’s install the requests library to make the HTTP request:
pip install requests
Now let’s write the code:
import requests
URL = 'https://en.wikipedia.org/wiki/Beer'
page = requests.get(URL)
Pretty straightforward, right? We imported the library that we installed earlier. We then defined the URL of the website we want to scrape, and we made a GET request. If you want to see what is the result, then go for it and print it. For now, you will see only a messy string that should represent the HTML you saw in your browser. It does not help us too much, so we need to process it.
Step 3: Scrape the page HTML
To extract some useful information from our result, we’ll install the beautifulsoup library:
pip install beautifulsoup4
Let’s first pretty format our result:
import requests
from bs4 import BeautifulSoup

URL = 'https://en.wikipedia.org/wiki/Beer'
page = requests.get(URL)

soup = BeautifulSoup(page.content, 'html.parser')
prettyHTML = soup.prettify()
print(prettyHTML)
We convert the previous result to a BeautifulSoup object. With the .content attribute, you can access the HTML data. Applying the .prettify() method, you can see the same format you saw in your browser earlier.
Unfortunately, not every website will give you their full HTML just like this. As stated earlier, there are some challenges that web scrapers encounter.
Step 3.1: Dynamic content
For example, some pages are visible only after login. Even if you authenticate from your browser, your python script will not be able to access the data.
Another common situation is that of dynamic websites. It means that the GET request response is not an HTML document but a Javascript script. Even if you can see the HTML in the browser, it is because it executes the script. But in your code, you need to run the script locally to get the HTML.
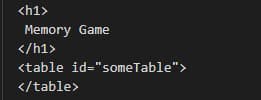
But let’s see this situation in practice. We’ll choose a minimalist example of a quickly built website from an older college exercise: https://dynamic-website.surge.sh.
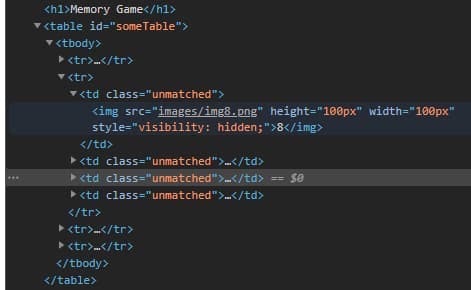
You can see the full HTML in your browser. In this example, it is a table that contains images in its cells.
import requests
from bs4 import BeautifulSoup

URL = 'https://dynamic-website.surge.sh'
page = requests.get(URL)
soup = BeautifulSoup(page.content, 'html.parser')

file = open('page.txt', mode='w', encoding='utf-8')
file.write(soup.prettify())
Now let’s extract this HTML, and this means we will run the same code as earlier, with a few changes: we updated the URL and opened a text file to store our result. We run the program and check the page.txt file for the same table section.
What is that? Where is the table? Well, it is there, except that there was no one to generate it yet. You can look into the <head> tag of the HTML document to see if there are any scripts used:
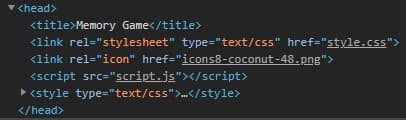
And yes, we do use a script.
To solve this problem, we need selenium, a library used for web testing and browser activities automation. We will use it in headless mode, which means that it will behave like a regular browser that will execute the Javascript code but with no visible UI.
pip install selenium
In this tutorial, we will use the ChromeDriver to configure the web driver for selenium. Just remember to copy the path where you download it! We saved it in the C directory, but any location will work.
from selenium import webdriver
from selenium.webdriver.chrome.options import Options
from bs4 import BeautifulSoup

CHROMEDRIVER_PATH = "your/path/here/chromedriver_win32/chromedriver"
URL = "https://dynamic-website.surge.sh"

options = Options()
options.headless = True
driver = webdriver.Chrome(CHROMEDRIVER_PATH, options=options)

driver.get(URL)
soup = BeautifulSoup(driver.page_source, 'html.parser')

file = open('page.txt', mode='w', encoding='utf-8')
file.write(soup.prettify())
The rest of the process is pretty much the same, except that we no longer use the requests library to make the HTTP request.
We rerun the program, and…
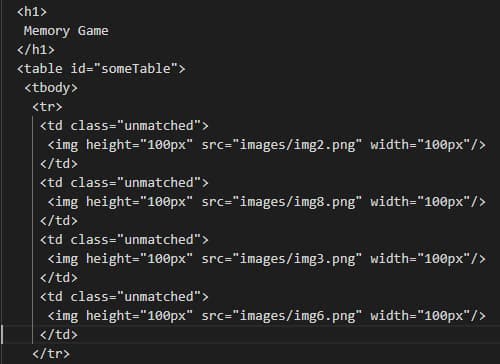
...Voila! We now have the full HTML.
Step 4: Extracting specific sections
Alright, let’s get back on track.
Having the full HTML is excellent progress, but the process is not over. Most of the time, we need specific information from a website, so let’s see how we can extract it.
Let’s start with something small - the title of the website. You can find it in the <head> section of the HTML, under a <title> tag.
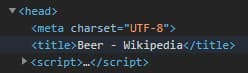
We know that a website has only one title, so that we will use the .find() method. It takes the tag’s name as an input and returns the HTML element, so if you need its content, simply access it through the .text attribute. Also, we will add a bit of structure to our little scraper.
def extract_title(soup):
    title = soup.find('title')

    #output: <title>Beer - Wikipedia</title>
    print('Title element: ', title)

    #output: Beer - Wikipedia
    print('Title: ', title.text)

def main():
    URL = 'https://en.wikipedia.org/wiki/Beer'
    page = requests.get(URL)
    soup = BeautifulSoup(page.content, 'html.parser')

    extract_title(soup)

main()
No rocket science here. BeautifulSoup is a powerful library and supports various patterns of extracting specific data. You can get HTML elements by their name, id, and class attribute, or you can even use CSS selectors. Sky's the limit!
Let’s go for more, like extracting elements that appear more than once. In this case, we use the .find_all() method. The only difference is that it returns a list of elements instead of just one. That is why after that, we iterate through it and display attributes of each element. As an example, we extracted all the images from the article:
def extract_images(soup):
    images = soup.find_all('img')
    for image in images:
        imageAlt = image.get('alt')
        imageSrc = image.get('src')
        print("ALT: ", imageAlt, "SRC: ", imageSrc)

def main():
    URL = 'https://en.wikipedia.org/wiki/Beer'
    page = requests.get(URL)
    soup = BeautifulSoup(page.content, 'html.parser')

    extract_images(soup)

main()
Step 5: Pass functions while scraping
A common situation in web scraping is when the parsing result list is very long and contains mixed information.
For example, you may have noticed that our previous images may or may not contain an alt attribute.
Or imagine we would extract all the links from the article. We all know that a Wikipedia article has A LOT of links, and we may not want a complete list of them. The result will have external and internal links, references, and citations, so we need to classify them into multiple categories.
To solve this problem, we are going to use a lambda function. Basically, the lambda will take as a parameter each element from the result list and apply the condition we define, just like using a filter.
For a practical example, let’s suppose we need to extract all the internal links, access their article, and make a summary of each. Considering that one of Python’s use cases is Artificial Intelligence, this example could be an excellent application to obtain training data.
First of all, we will need to install the NLTK library because computing a summary implies processing the human language.
pip install -U nltk
And, of course, to import it in our code:
import re
import nltk
import heapq
# need to download only for the first execution
# warning: the size of the dataset is big; hence it will take time
nltk.download()
Note: if you are a macOS user, you may get an “SSL: certificate verify failed” error. The cause may be that Python3.6 uses an embedded version of OpenSSL. All you have to do is to open the location where you installed Python and run this file:
/Your/Path/Here/Python 3.6/Install Certificates.command
As you can see, we also imported the re library, used for operations with regular expressions and heapq, an implementation of heap queue.
Good, we have all we need to start writing the code. Let’s begin by extracting the internal links. If you go back to the browser, you will notice a few things about the elements we are interested in.
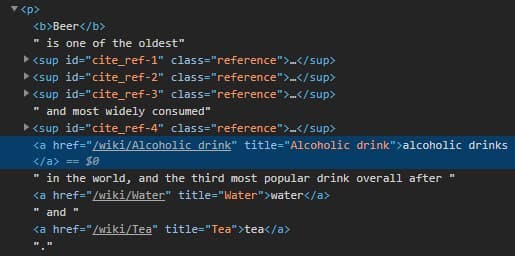
Those things would be:
- The href attribute has a value;
- The href value begins with “/wiki/”;
- The link’s parent is a <p> tag;
These characteristics will help us to differentiate the links we need from all the others.
Now that we know how to find the links let’s see how we can extract them.
count = 0

def can_do_summary(tag):
    global count
    if count > 10: return False

    # Reject if parent is not a paragraph
    if not tag.parent.name == 'p': return False

    href = tag.get('href')
    # Reject if href is not set
    if href is None: return False

    # Reject is href value does not start with /wiki/
    if not href.startswith('/wiki/'): return False

    compute_summary(href)
    return True


def extract_links(soup):
    soup.find_all(lambda tag: tag.name == 'a' and can_do_summary(tag))

def main():
    URL = 'https://en.wikipedia.org/wiki/Beer'
    page = requests.get(URL)
    soup = BeautifulSoup(page.content, 'html.parser')

    extract_links(soup)

main()
Alright, so what happened here? Looking at the extract_links() function, we can see that instead of a tag’s name, we passed a lambda function as a parameter to the .find_all() method. That means that we pick only the ones that match our condition from all the HTML document’s tags.
As you can see, a tag’s condition is to be a link and to be accepted by the can_do_summary() function defined above. Over there, we reject everything that does not match the characteristics observed earlier. Also, we used a global variable to limit the number of extracted links to 10. If you need all of them, feel free to remove the count variable.
In the end, we call the compute_summary() function for the newfound link. That is where the article is summarized.
def compute_summary(href):
    global count
    full_link = 'https://en.wikipedia.org' + href
    page = requests.get(full_link)
    soup = BeautifulSoup(page.content, 'html.parser')

    # Concatenate article paragraphs
    paragraphs = soup.find_all('p')
    article_text = ""
    for p in paragraphs:
        article_text += p.text

    # Removing Square Bracket, extra spaces, special characters and digits
    article_text = re.sub(r'\[[0-9]*\]', ' ', article_text)
    article_text = re.sub(r'\s+', ' ', article_text)
    formatted_article_text = re.sub('[^a-zA-Z]', ' ', article_text)
    formatted_article_text = re.sub(r'\s+', ' ', formatted_article_text)

    # Converting text to sentences
    sentence_list = nltk.sent_tokenize(article_text)

    # Find frequency of occurrence of each word
    stopwords = nltk.corpus.stopwords.words('english')

    word_frequencies = {}
    for word in nltk.word_tokenize(formatted_article_text):
        if word not in stopwords:
            if word not in word_frequencies.keys():
                word_frequencies[word] = 1
            else:
                word_frequencies[word] += 1

    maximum_frequency = max(word_frequencies.values())

    for word in word_frequencies.keys():
        word_frequencies[word] = (word_frequencies[word] / maximum_frequency)

    # Calculate the score of each sentence
    sentence_scores = {}
    for sent in sentence_list:
        for word in nltk.word_tokenize(sent.lower()):
            if word in word_frequencies.keys():
                if len(sent.split(' ')) < 30:
                    if sent not in sentence_scores.keys():
                        sentence_scores[sent] = word_frequencies[word]
                    else:
                        sentence_scores[sent] += word_frequencies[word]

    # Pick top 7 sentences with highest score
    summary_sentences = heapq.nlargest(7, sentence_scores, key=sentence_scores.get)
    summary = '\n'.join(summary_sentences)
    count += 1
Long story short, we make an HTTP request to the newfound URL and convert the result to a BeautifulSoup object, just like we did at the beginning of the article.
To compute a summary, we extract all the paragraphs from the article and concatenate them together. After that, we remove all the special characters that could interfere with the calculations.
In simple terms, a summary is made by calculating the most frequent words and giving each sentence a score based on how frequent their words are. In the end, we pick the top 7 sentences with the highest score.
This is not the subject of our article, but you can read more here if you are curious or even passionate about Natural Language Processing.
Step 6: Generate a CSV to store your data
Moving forward to the last step of this guide, we need to look at the scraping results. Until now, we just displayed them in the terminal because there were only a few rows of data.
But real-life scraping means a considerable amount of information, so we should see how we can save the results in a file.
Let’s use the native library csv(so there is no need to install anything else) and open a file named summaries.csv.
import csv
summaries_file = open('summaries.csv', mode='a', encoding='utf-8')
The library will create the file if it does not exist. Also, we open it in ‘append’ mode because each link is processed sequentially, one by one.
    summaries_writer = csv.writer(summaries_file, delimiter=',', quotechar='"', quoting=csv.QUOTE_MINIMAL)
    summaries_writer.writerow([full_link, summary])
At the end of the compute_summary() function, we simply initialize the writer and begin appending the data. A row is composed of the article's URL and its summary.
Step 6.1: Generate a JSON file
Another format of data serialization that became popular in the last years is JavaScript Object Notation (JSON). It is easily human-readable and handy if you want to pass the scraped data to an API or another application.
In Python, the easiest way to write a JSON file is to pass the data to a dict object.
import json

summaries_file = open('summaries.json', mode='a', encoding='utf-8')
data = {}
data['summaries'] = []
We will use the native library for JSON files and open a new file, just like we did previously with our CSV one. Then we initialize an empty dict object and an empty list that will contain our summaries.
data['summaries'].append({
'url': full_link,
      'summary': summary
})
At the end of compute_summary() function, right where we wrote in the CSV earlier, now we append a new dict object to the final list.
json.dump(data, summaries_file, indent=4)
And lastly, in our main() function, after we executed the extract_links() process, we write the final object in the file. The indent parameter will only pretty format the result.
Conclusion and alternatives
Well, that’s it, the end of our tutorial. I hope it was helpful and gave you some good insight into web scraping using Python.
We learned about its benefits and how it can improve your business/application. At the same time, we balanced this information with some of the challenges encountered in web scraping.
If you are a developer, you may find it exciting to build on your own a web scraper by overcoming all these issues. It can be a cool learning experience.
But as a business owner (or as someone who needs data for a real-life large-scale application), you may want to avoid the costs involved (time, money, people).
In this situation, using a dedicated API will solve the problem. WebScrapingAPI overcomes all possible blocking points: Javascript rendering, proxies, CAPTHAs, etc., and offers customizable features. Also, if you are not entirely sure about it, remember that there’s a free plan option, so why not give it a try?
News and updates
Stay up-to-date with the latest web scraping guides and news by subscribing to our newsletter.
We care about the protection of your data. Read our Privacy Policy.

Related articles
Explore the in-depth comparison between Scrapy and Selenium for web scraping. From large-scale data acquisition to handling dynamic content, discover the pros, cons, and unique features of each. Learn how to choose the best framework based on your project's needs and scale.

Explore the transformative power of web scraping in the finance sector. From product data to sentiment analysis, this guide offers insights into the various types of web data available for investment decisions.


Explore a detailed comparison between Scrapy and Beautiful Soup, two leading web scraping tools. Understand their features, pros and cons, and discover how they can be used together to suit various project needs.